
How to automatically assign a sales rep when creating a customer record in NetSuite

In this guide, we’ll walk through how to automatically assign a sales rep when creating a customer record, based on the subsidiary selected. This ensures consistency, saves time, and reduces manual errors.
What we’ll do
Create a custom field on the Subsidiary record to store the default Sales Rep. This will let us associate a default rep with each subsidiary.
Build a workflow that sets the Sales Rep on new Customer records based on the Subsidiary’s assigned default Sales Rep.
How to create the custom field
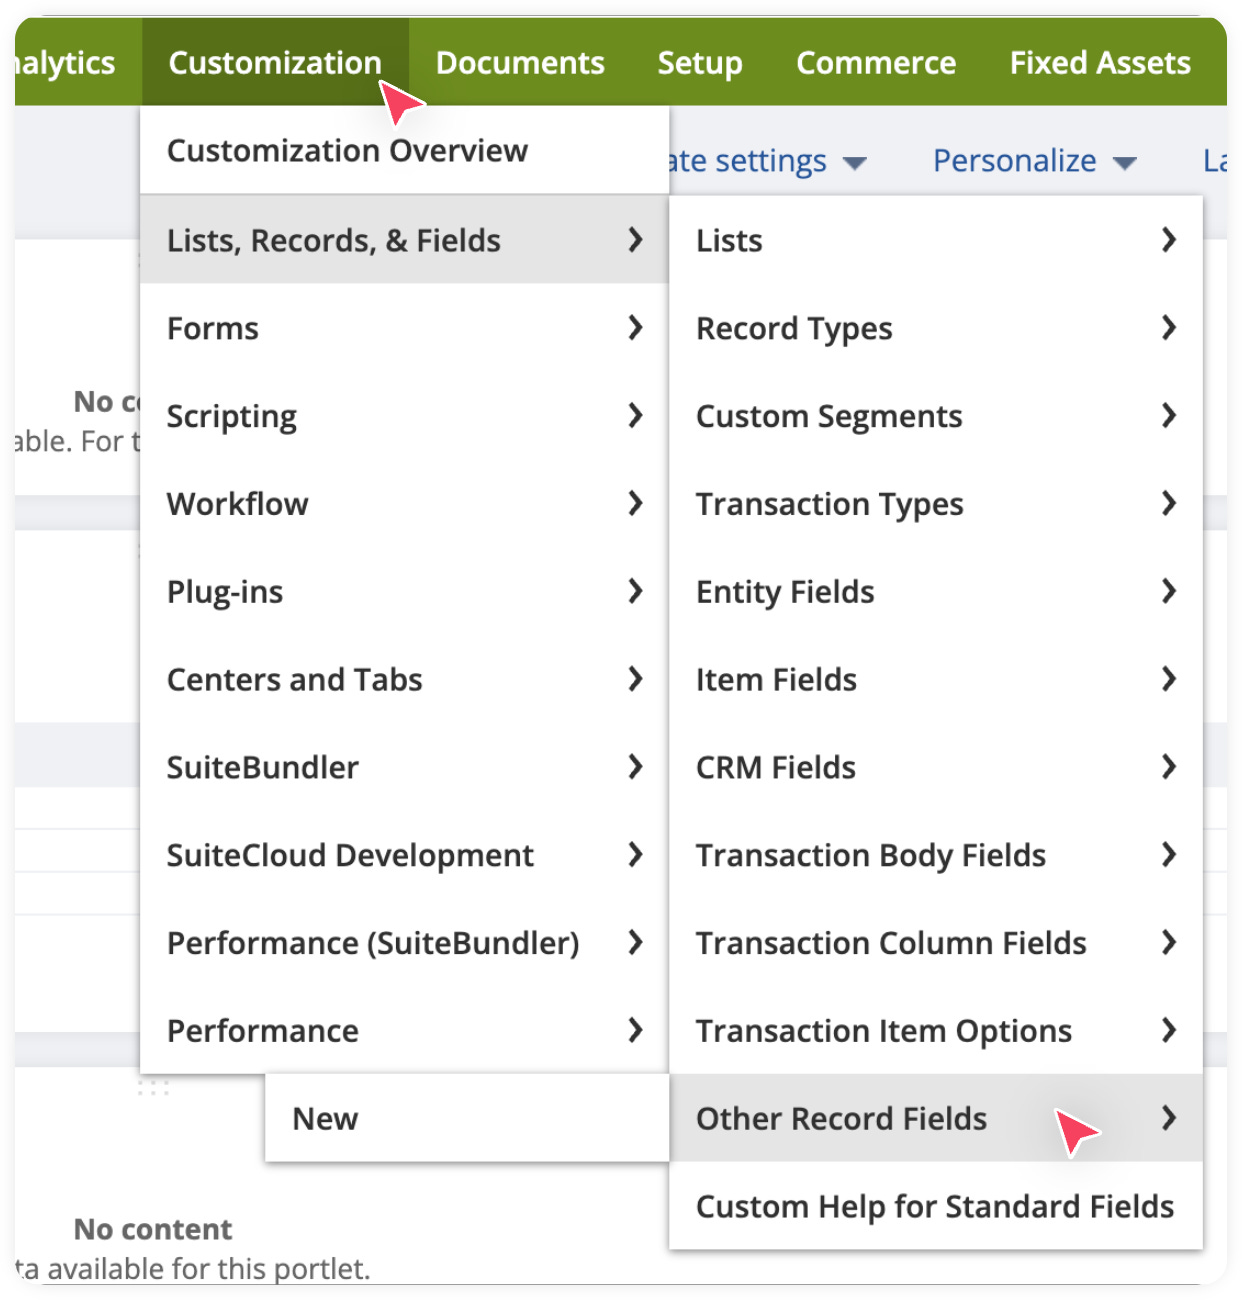
In your NetSuite, Go to Customization > List, Records, & Fields > Other Record Fields > New.

In the next screen, Set Record Type = Subsidiary, Set Label, Set Type = List/Record, Set List/Record = Employee.
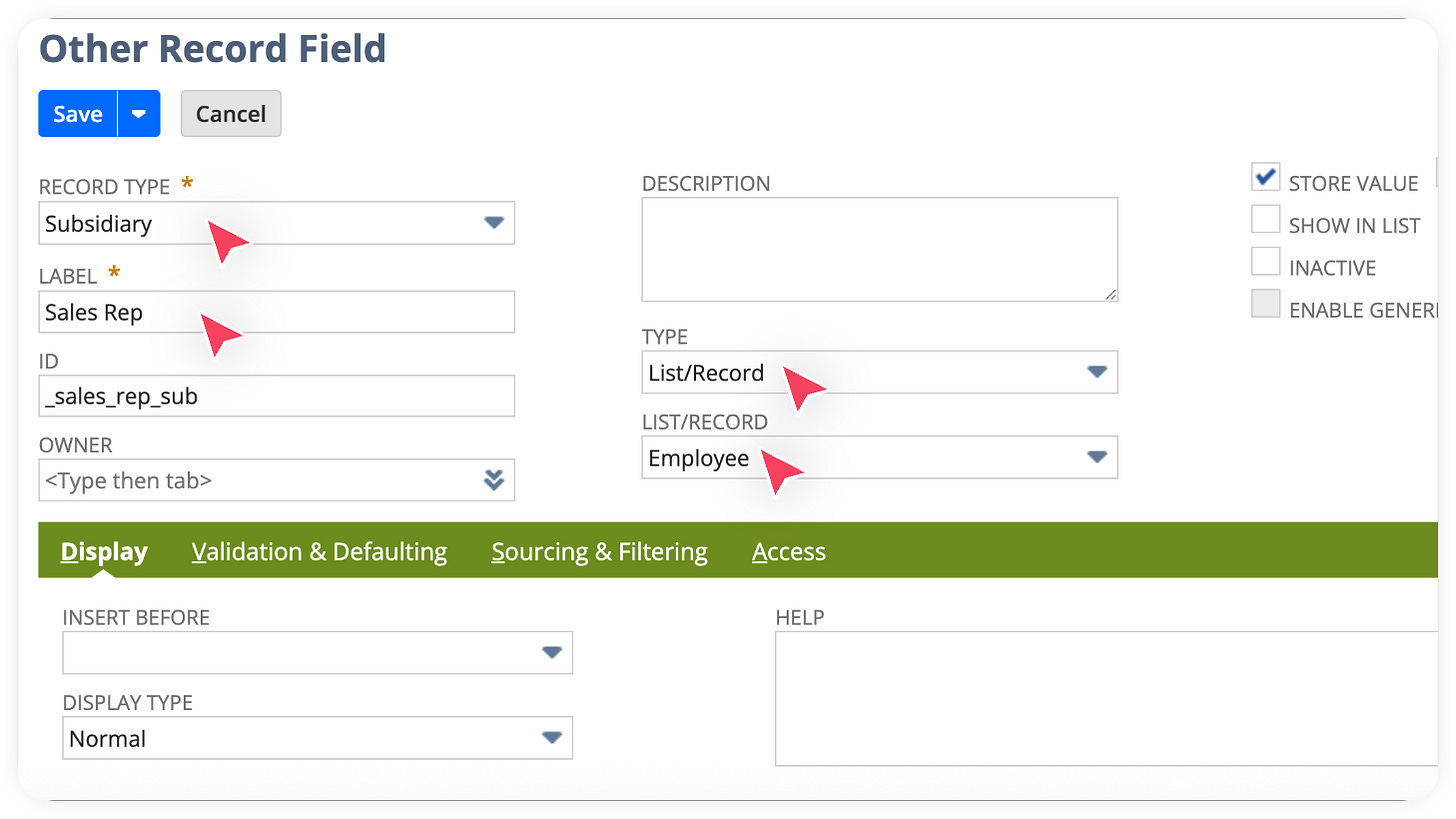

Click Save.
Great work! You just created a custom field in NetSuite.
The next step is to create a workflow that automatically assigns the Sales Rep when a new Customer record is created. This workflow will reference the default Sales Rep stored on the Subsidiary record and use it to populate the Sales Rep field on the Customer.
How to create the workflow
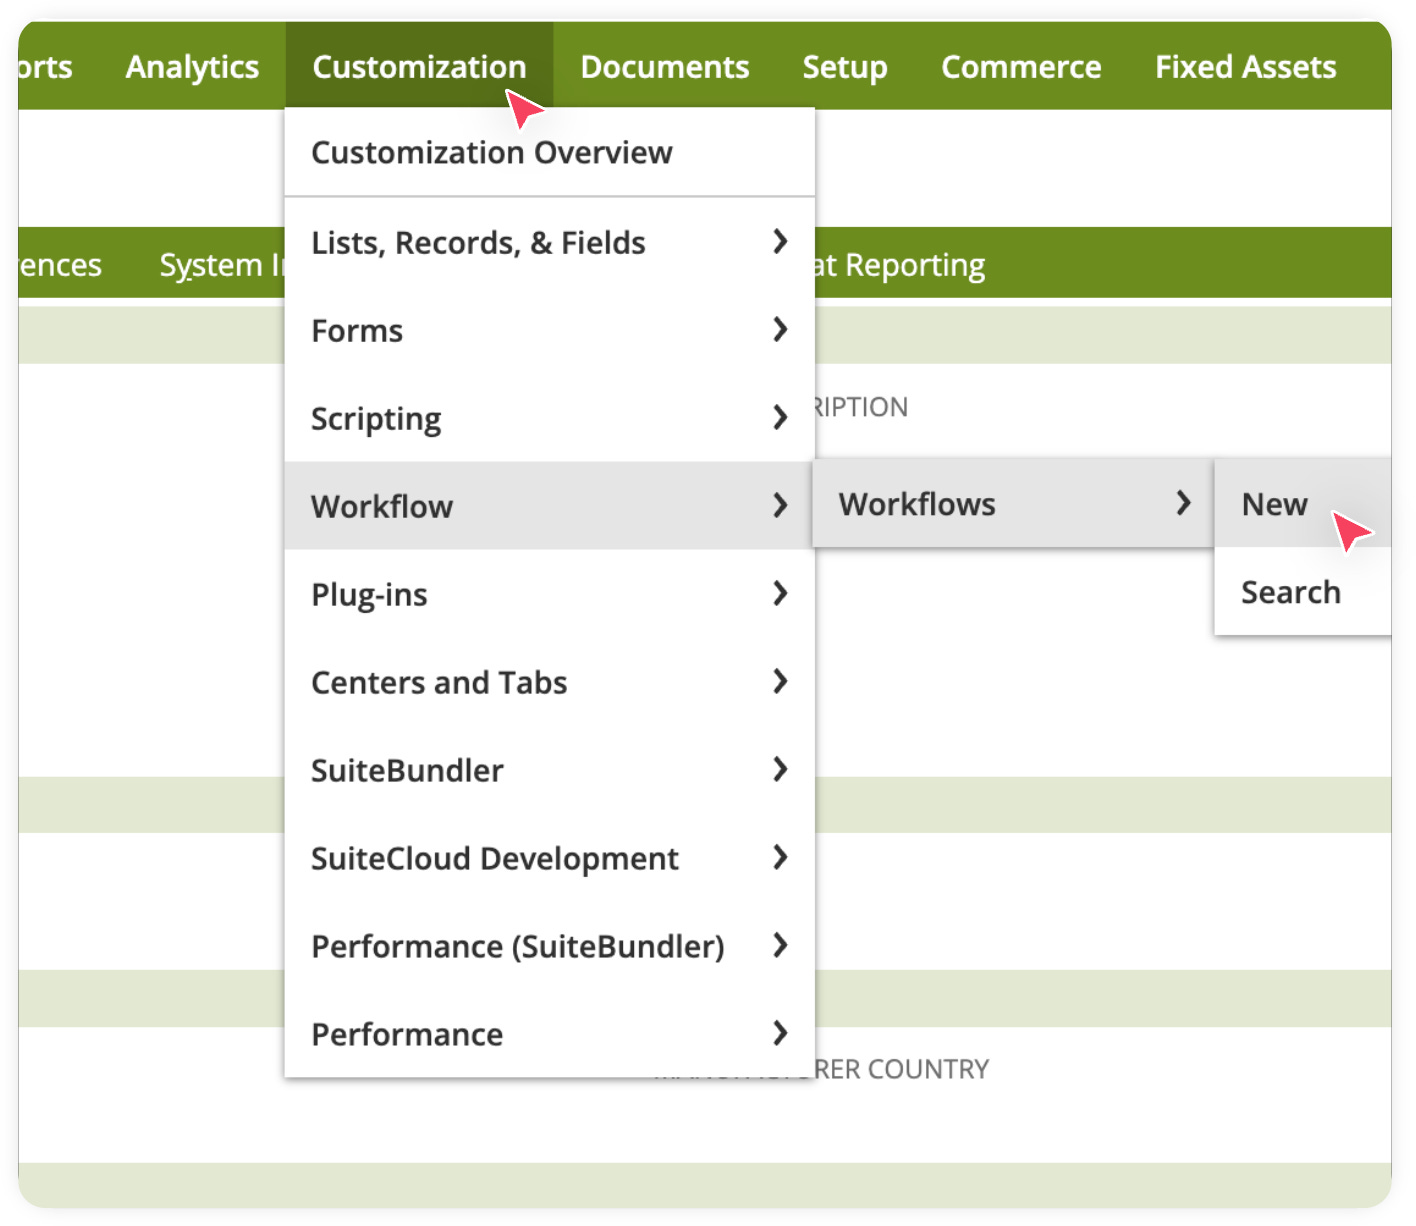
In your NetSuite account, Go to Customizations > Workflows > New.

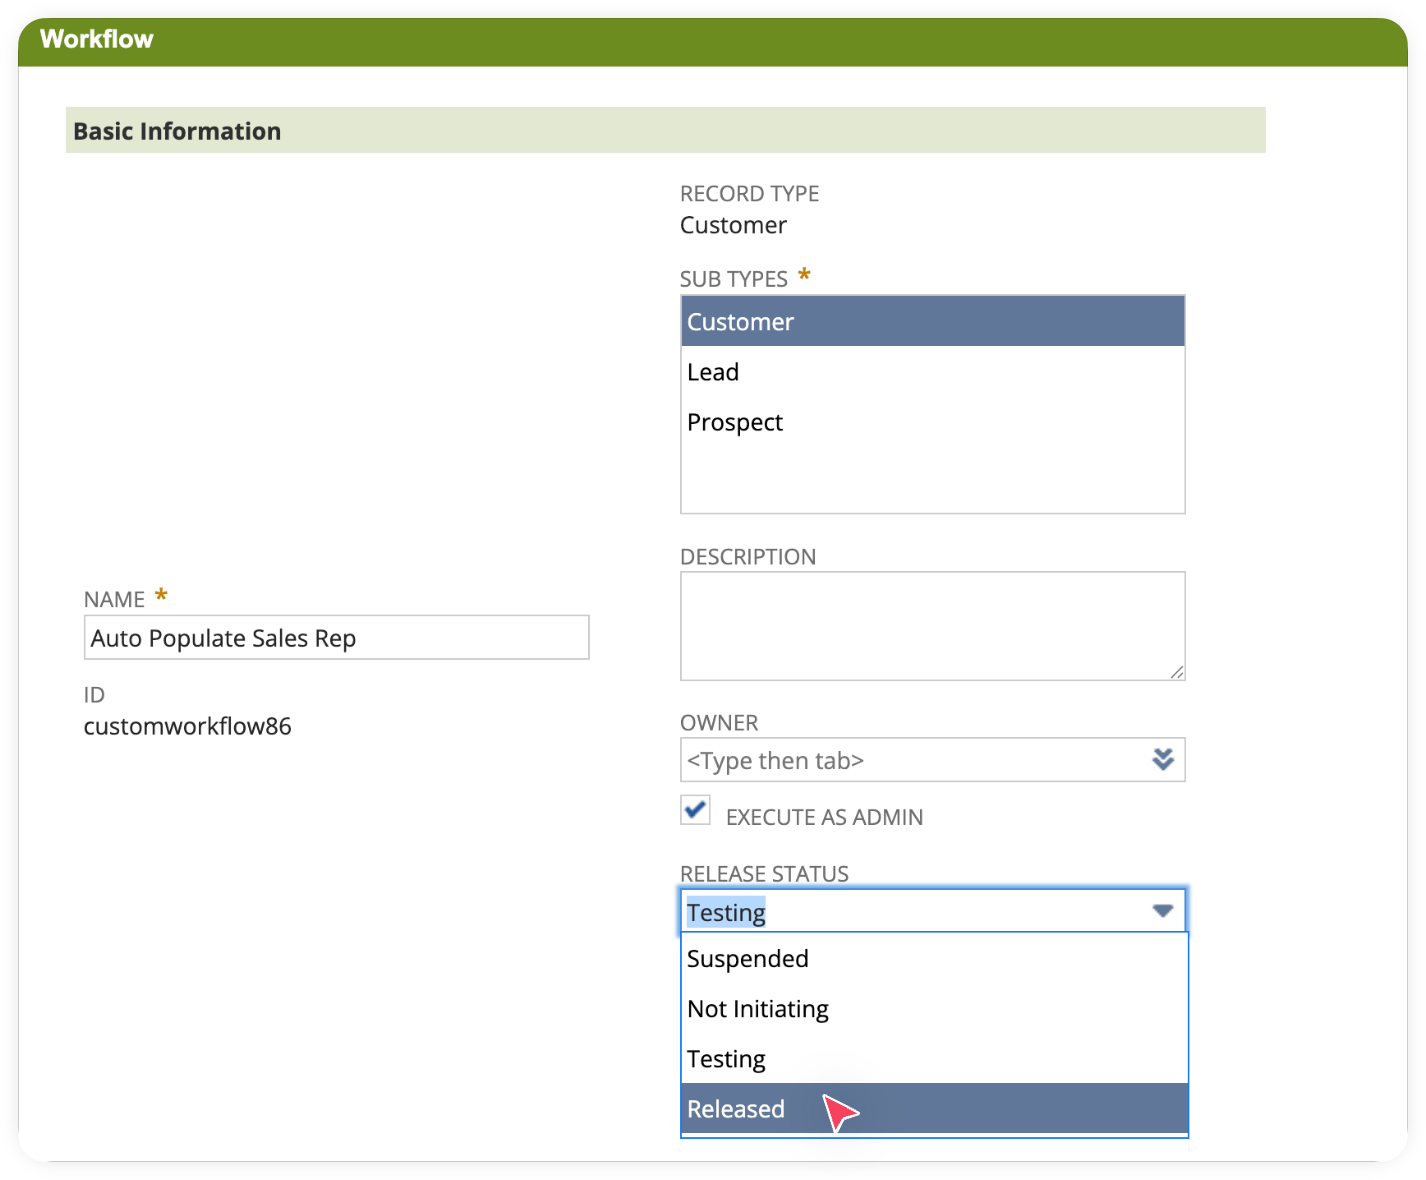
Enter Name, Record Type = Customer, Select Sub Types, Select Owner, Check Execute as Admin, Set Release Status = Testing (for now, we will make it released later) and Check Enable Logging.


In the Initiation section, scroll down and check Event Based. This makes the workflow run whenever a record event occurs, such as create or edit.
In the Event Definition, check On Create, set Trigger Type to Before Record Submit, and select Event Types as Create.
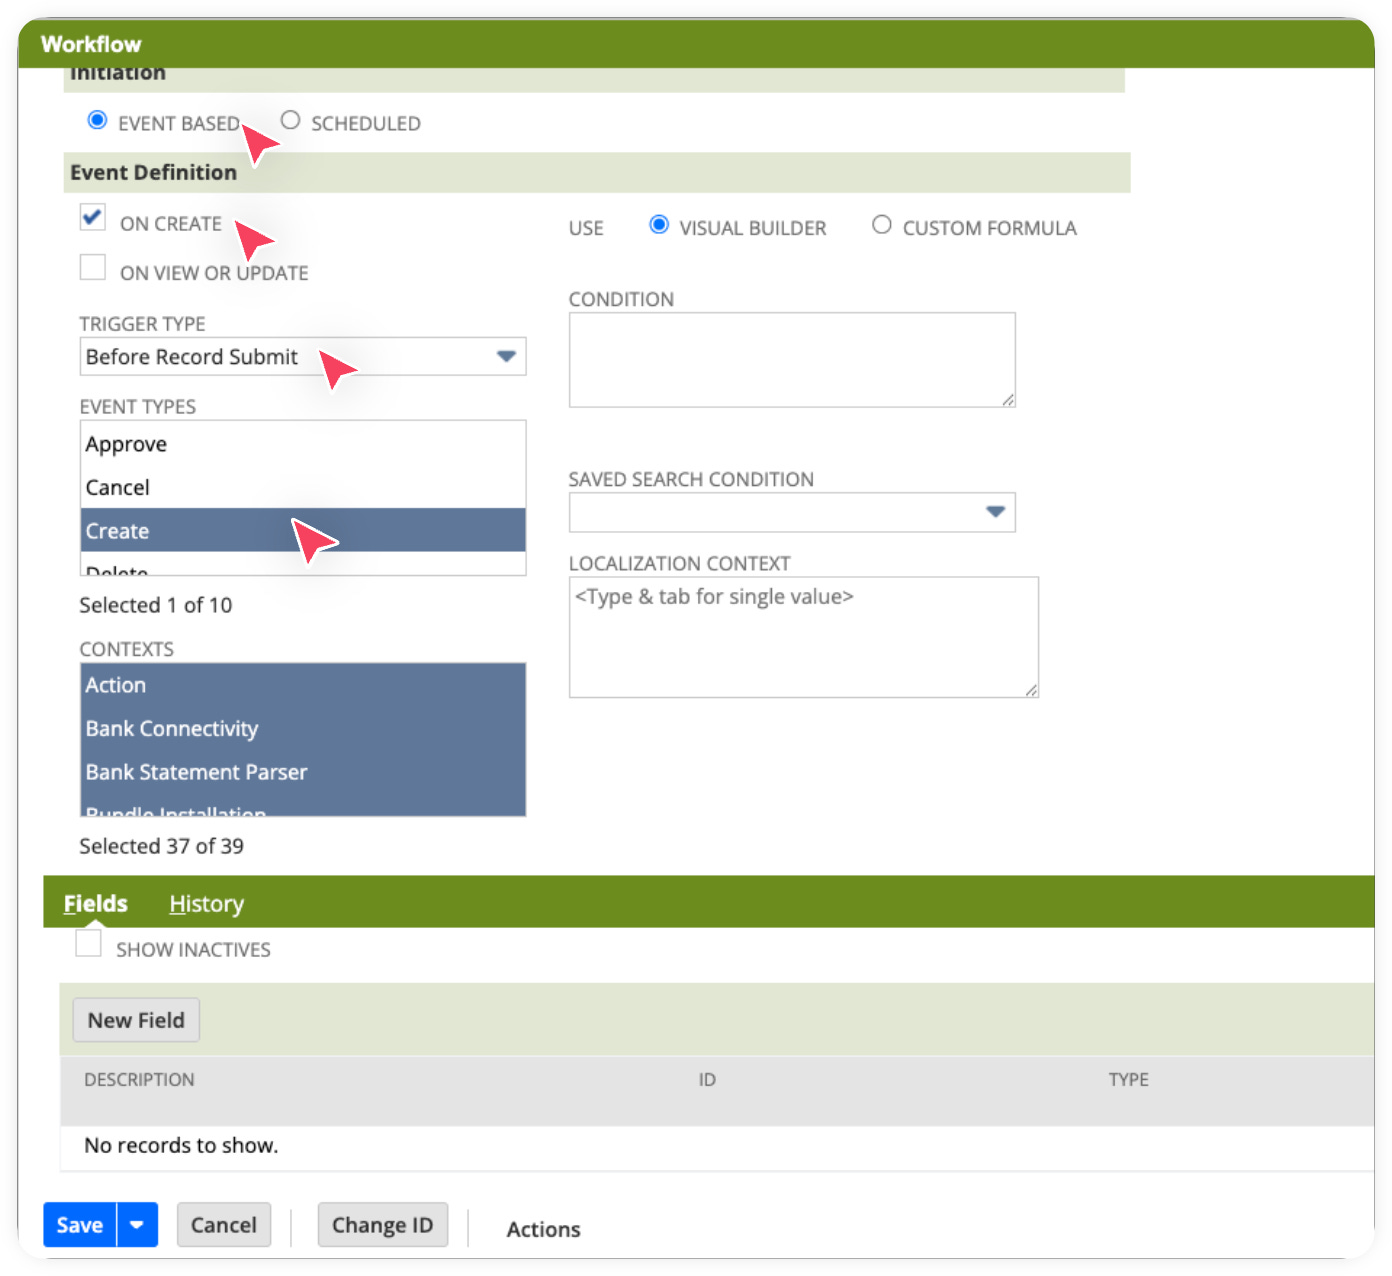

Save
Great work! You’ve created the workflow. Now, the next step is to define the states and add the actions so the workflow can actually perform the intended tasks.
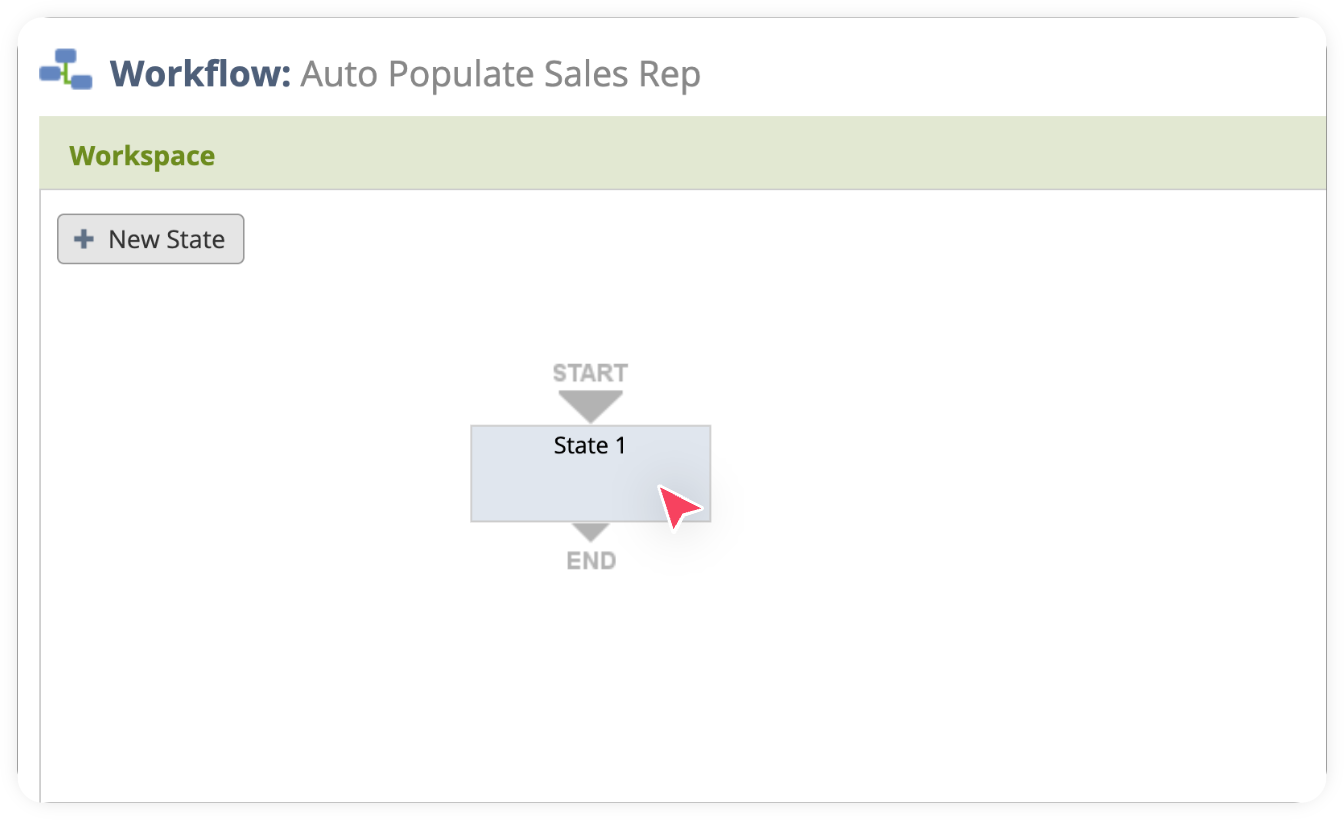
How to create an action in the Workflow
Click on the State1 shown on the left-hand side of your workflow screen.

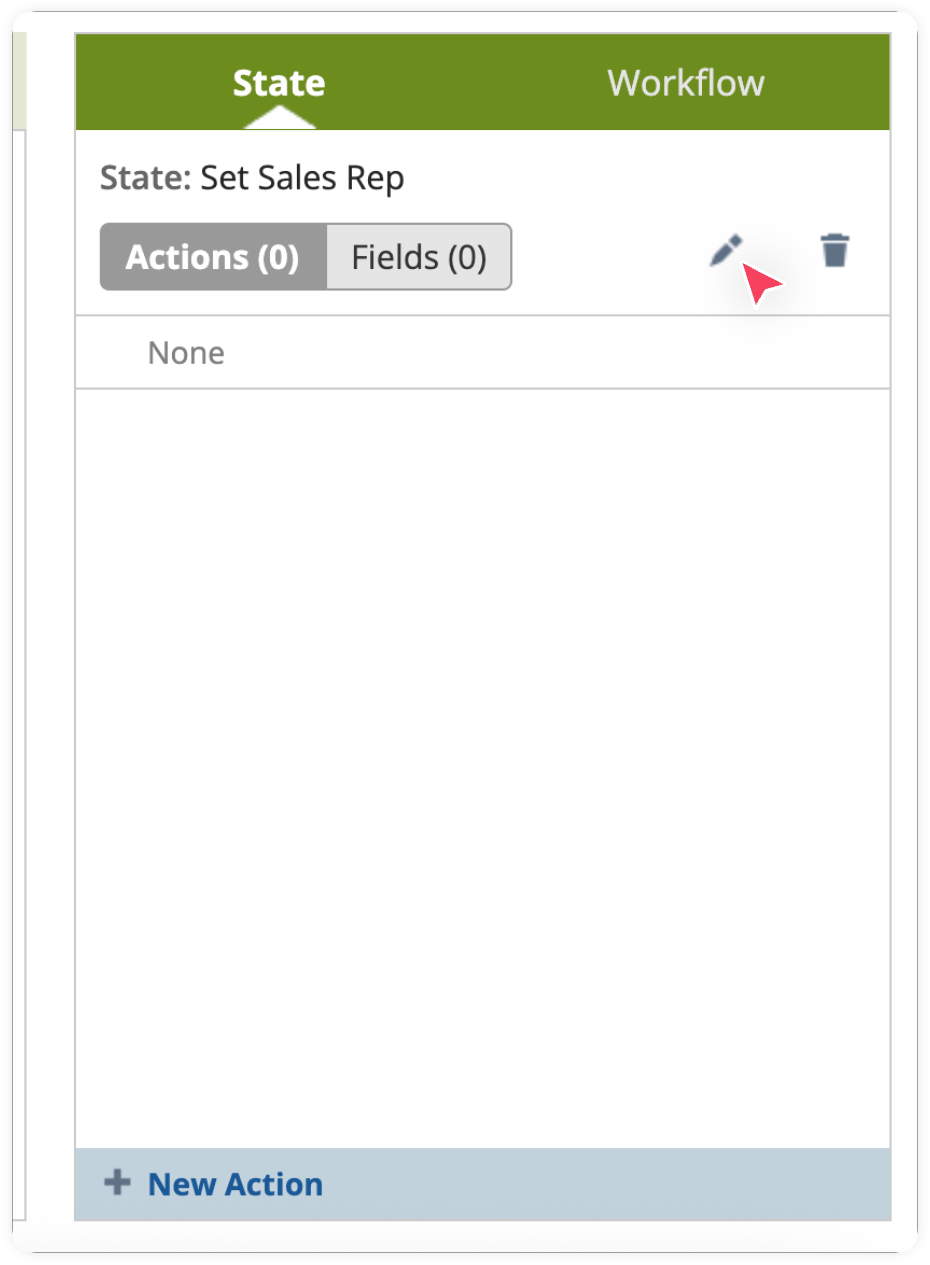
Now, we need to add a state. Click the pencil icon under the State tab.

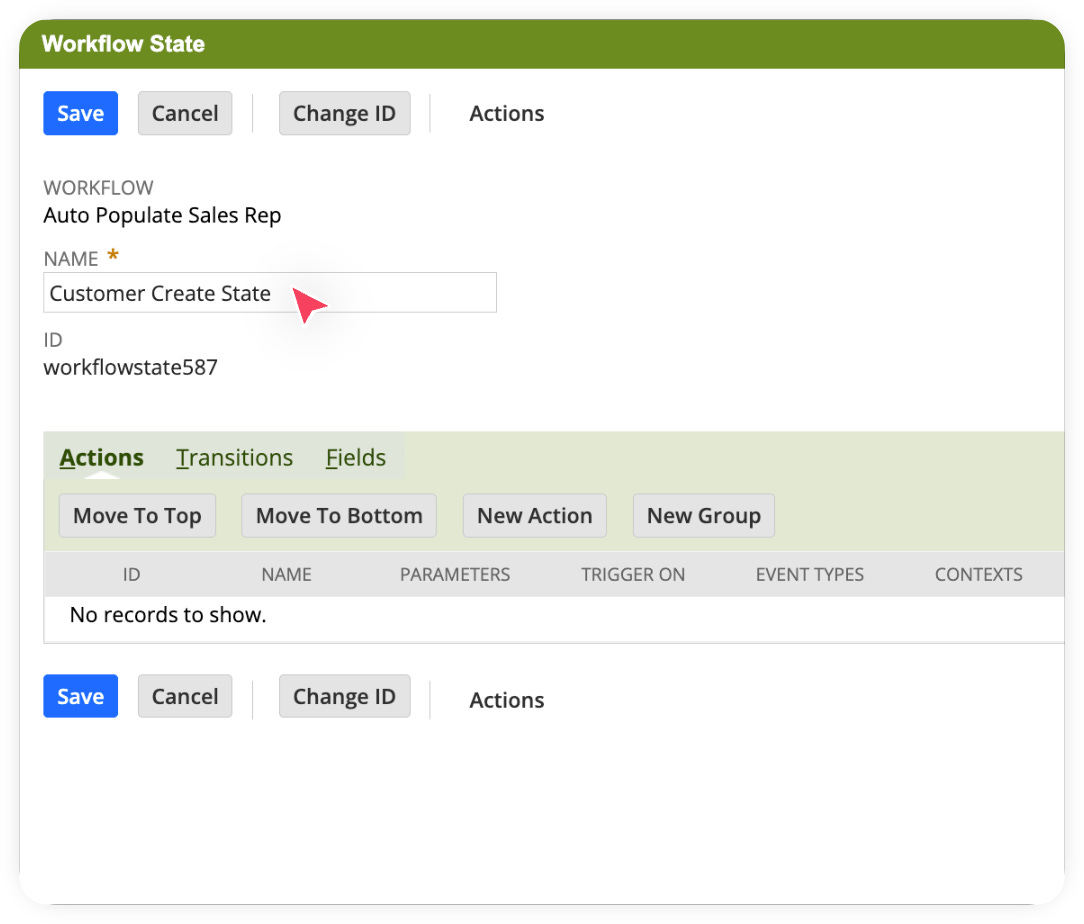
In the next screen, enter the name of your State. Click Save.

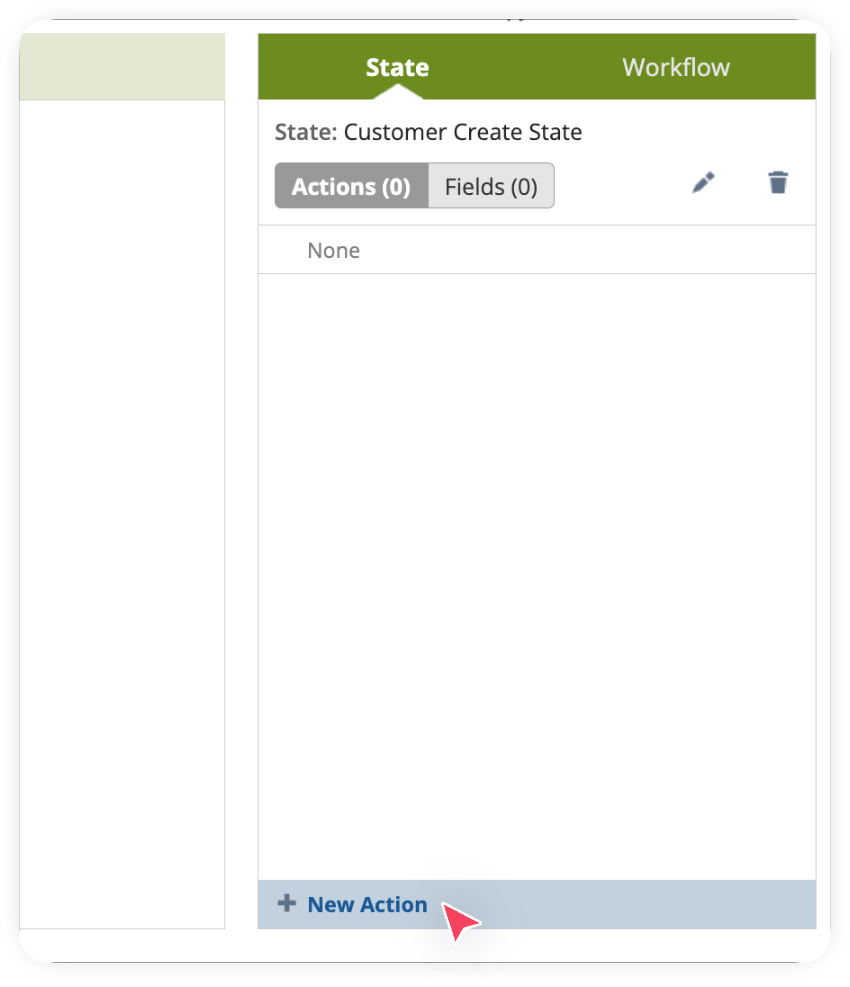
Now it’s time to add an Action. This is where we’ll configure the workflow to set the Sales Rep on the Customer record.
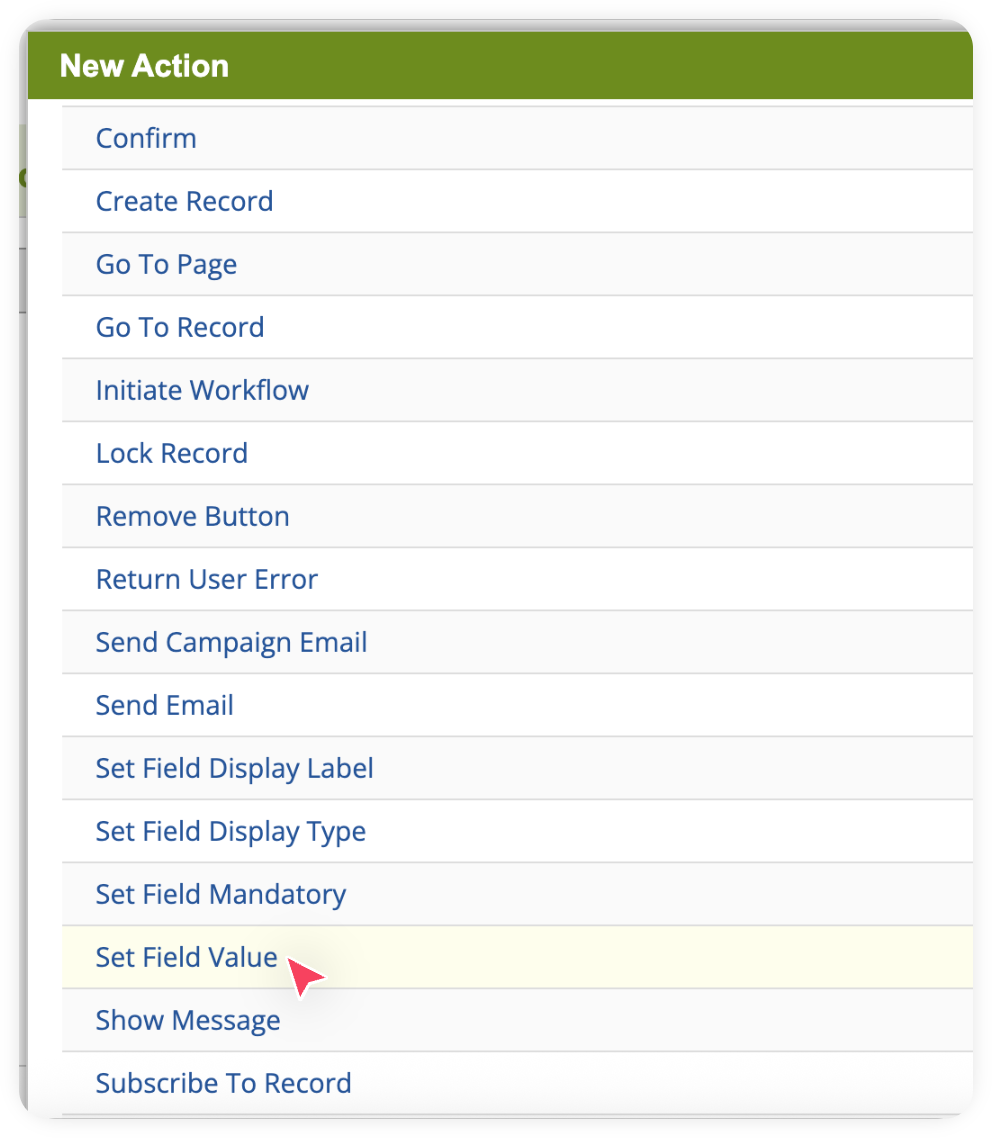
Under your State Tab, click on New Action.

In the next screen, select Set Field Value.

Now, Set Trigger On to Before Record Submit, Select Event Types as Create.

Scroll down to the Parameters section, select Field as Sales Rep, check From Field, then set Record (Join Field) to Subsidiary and choose Sales Rep as the field. Click Save.
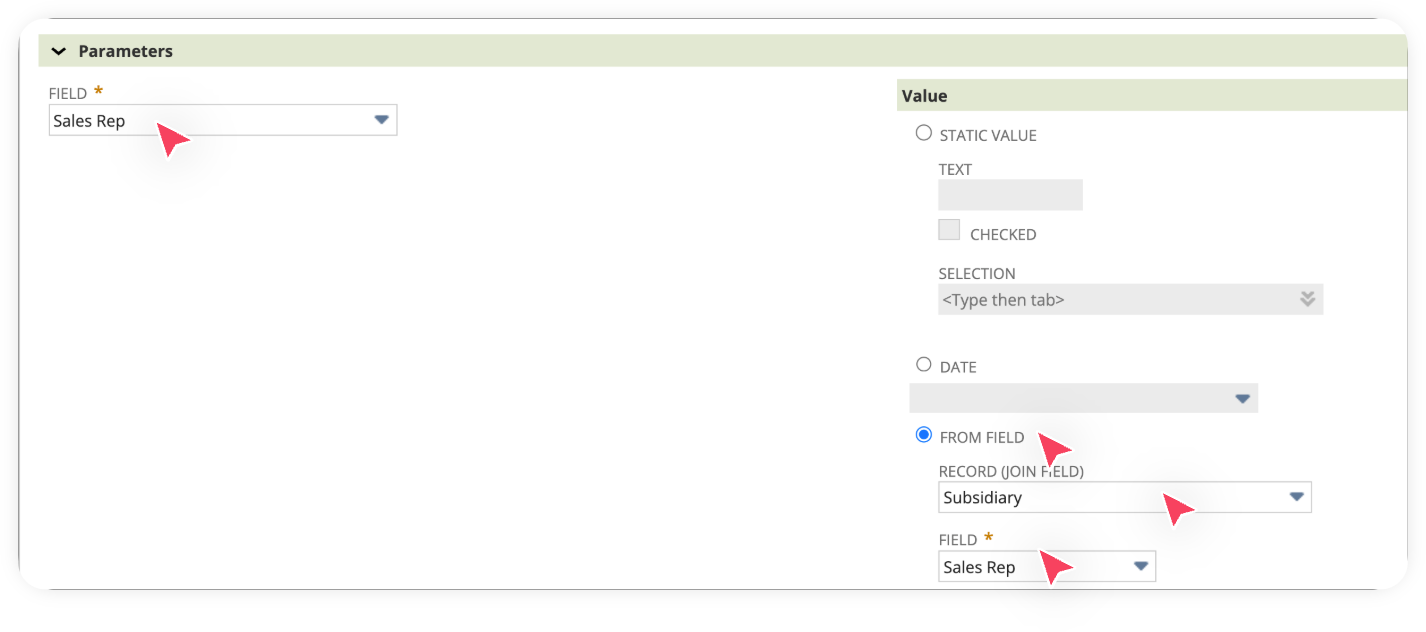

Explanation: We just mapped the custom field created earlier on the Subsidiary record to the Sales Rep field on the Customer record.
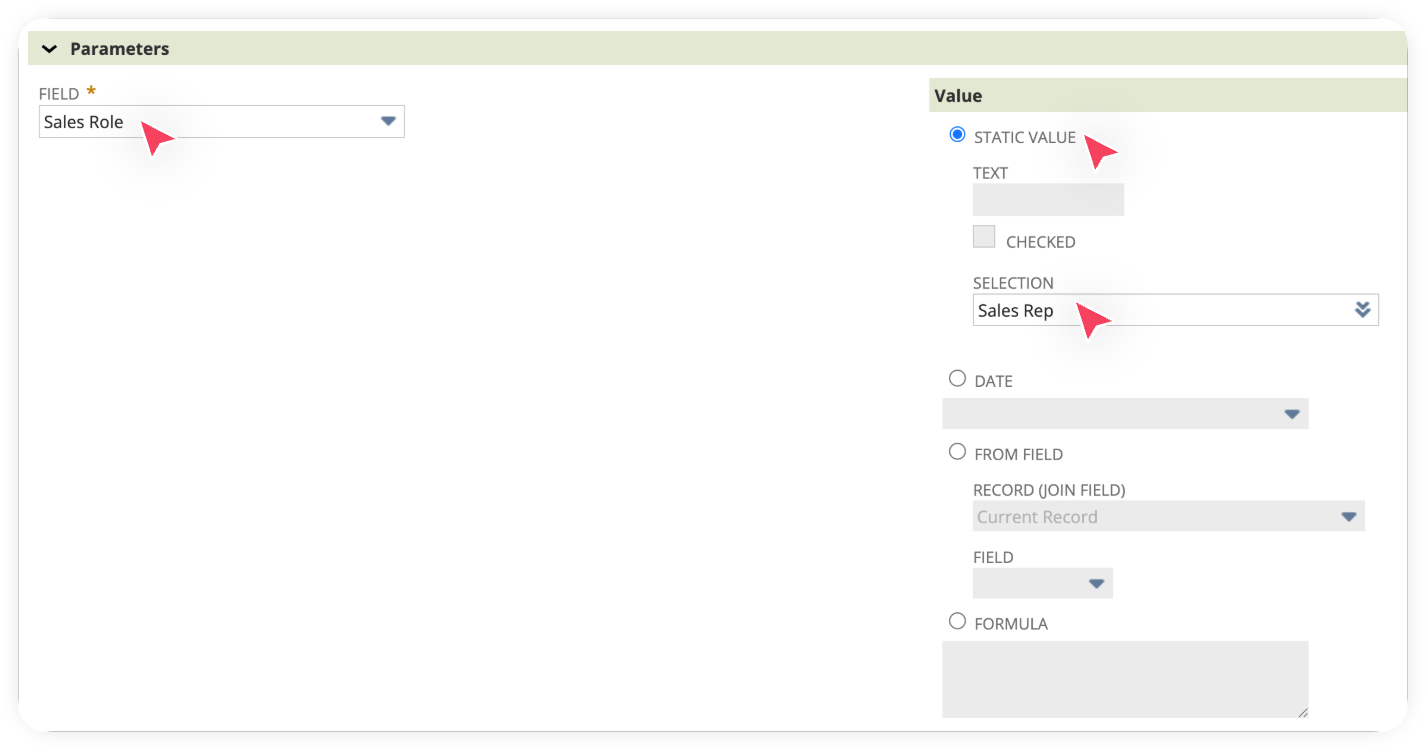
We also need to add another action to define the role for the Sales Rep. To do this, click New Action again under the State tab of the workflow. In the next screen, select Set Field Value. Now, Set Trigger On to Before Record Submit, Select Event Types as Create.

Scroll down to the Parameters section, select Field as Sales Role, check Static Value and then set Selection as Sales Rep. Click Save.
Congratulations! You’ve just created a workflow that automates setting the Sales Rep on the Customer record during the creation event. Along the way, you also learned how to add states and actions in a workflow, and most importantly how to apply a join on a related Subsidiary record, which is a very useful skill.
Important: If your workflow works as expected, go back to the workflow and change its status to Released. This will make it active and available for everyone else in the account.
Really useful and detailed article. I have one question though: is there a difference between assigning a sales rep using the above customisation and using NetSuite's native sales rules and territory assignment? With the sales rules, you can assign a sales rep based on the subsidiary.